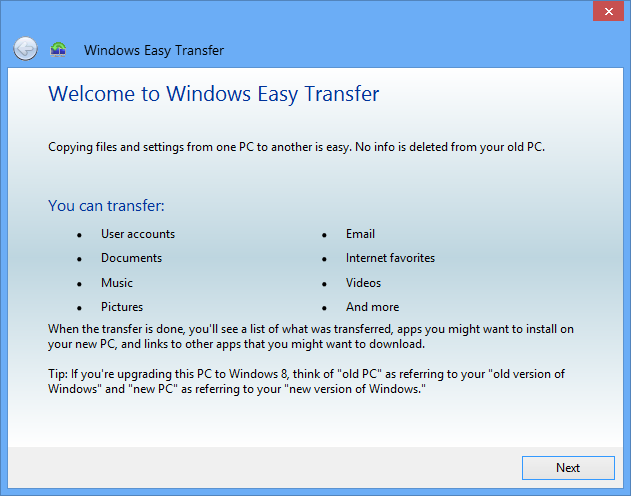
Using the Easy Transfer Wizard is super simple. You can use this tool
to transfer you files and settings even if you are moving from an 32 bit
(x86) environment to an 64 bit (x64). Basically you run the program on
your old computer, it grabs all your “stuff” and zips it up for you and
places it on a USB hard drive. You then plug that USB hard drive into
your new Windows 8 computer and run the wizard again to do the restore.
You do have to be able to login to both your old computer and your new
computer as an administrator. - See more at:
http://itproguru.com/expert/2013/02/migration-and-deployment-how-to-migrate-or-transfer-files-and-settings-to-windows-8-from-windows-7-vista-or-xp-part-4-of-19/#sthash.f7d8XEfD.dpuf
Windows XP/Windows Vista:
For migrating from Windows XP, you will need to download and install the Windows Easy Transfer Wizard. If your old PC isn't running Windows 7, you'll need to install the appropriate version of Windows Easy Transfer.
For Windows XP Download (32 bit) / Download 64-bit\
For Windows Vista Download (32 bit) / Download 64-bit
Windows 7 already has a Windows Easy Transfer program so you can just run it.
To use the Windows Easy Transfer feature, you must be an Administrator on both the Source (OLD) computer and the Destination (NEW) Windows 8-based computer.
To transfer files and settings from your local computer to the local workgroup or domain-joined computer, follow these steps:
Save files and settings on the local computer. follow these steps:
On the Start screen, type Windows Easy Transfer, and then click Windows Easy Transfer from the results.
On the Welcome to Windows Easy Transfer page, click next. Select an external hard disk or USB flash Drive, and then plug in the external storage drive.
Select this is my old PC. Windows Easy Transfer will scan all user profiles and data on the computer. To select what to transfer, click Customize, and then click Advanced to change your selections.
After you make your selections, click Save.
Click Next.
Enter the password, and then click Save to save the Easy Transfer file to the external storage drive. Click next two times, and then click Close to close the Windows Easy Transfer wizard.
Import files and settings on the domain-joined computer.
follow these steps:
On the Start screen, type Windows Easy Transfer, and then click Windows Easy Transfer from the results.
On the Welcome to Windows Easy Transfer page, click next. Select an external hard disk or USB flash Drive.
Select this is my new PC.
Plug in the external storage drive, and then select yes.
Locate where you saved the Easy Transfer file, and then click Open.
Enter the password that you specified in Step 1G, and then click next.
To select what to transfer, click Customize, and then click Advanced to change your selections. After you make selections, click Save.
Note To map user accounts or to map drives, click Advanced Options.
Click Transfer.
After the transfer finishes, click See what was transferred to view the Windows Easy Transfer reports. Click See a list of apps you might want to install on your new PC to see the programs that are installed on your old computer.
Click Close to close the Windows Easy Transfer wizard.
Restart the computer.
To install Windows 8 apps on the domain-joined computer, follow these steps:
- On the Start screen, click Store.
- Click the apps that you want to install, and then click Install.
