To start, press “Win + R,” type regedit and press the Enter button to open the Windows Registry.
Navigate to the following path in the Registry:
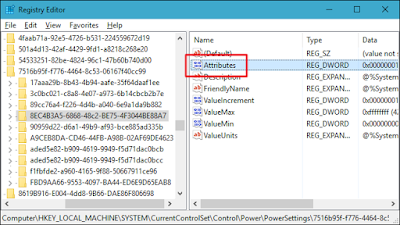
HKEYLOCAL_MACHINE\SYSTEM\CurrentControlSet\Control\Power\PowerSettings\7516b95f-f776-4464-8c53-06167f40cc99\8EC4B3A5-6868-48c2-BE75-4F3044BE88A7
On the right-hand side window double click on Attributes DWORD.
If you can’t find it then you need to create the DWORD, right-click in an empty area in the right-hand side window and select New > DWORD (32-bit) value.
Name it as Attributes and double click on it.
Change the Windows 10 Lock Screen Timeout in Power Options
Click the Start menu and type “Power Options” and hit Enter to open Power Options.
In the Power Options window, click “Change plan settings”
In the Change Plan Settings window, click the “Change advanced power settings” link.

Comments