Disabling Cortana in Windows 10
Since Cortana works only when you are signed in to Windows 10 using your Microsoft account, you must ensure that you are signed in using before you begin with the process.
Once you are sure that you no longer need or want Cortana in Windows 10, here is how you can disable it:
Sign-in to your Windows 10 computer with your Microsoft account.
Once on the desktop screen, click inside the Cortana search bar next to the Start button.
In the search box at the bottom, type Disable Cortana.
Once the suggestions appear in the list, click Cortana & Search settings.
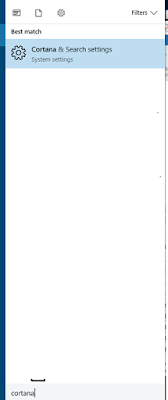
The first thing you'll need to do is open up Cortana. One way to do this is by typing "cortana" in the Windows 10 search bar (shown below) and selecting the Best Match that appears called Cortana & Search Settings
From the right section of the Settings pane, move the top button to Off to disable Cortana from Windows 10.
Once you do this, you'll simply need to click the indicator to 'Off'.
If it is successfully disabled, you will get a notification telling you so and instructions on how to enable Cortana again, if you decide to.
Deleting Personal Information From Cortana
You now have the option to remove all of the data Cortana may have collected about you to "personalize" your experience. To do this, click on the Manage what Cortana knows about me in the cloud link. You'll then be brought to a web page that shows various categories of personal information that Microsoft has collected about you.
To remove all of the personal information that Cortana has collected, you'll need to click on both Clear buttons under Interests and Other Cortana Data and Personalized Speech, Inking and Typing.


Comments